How to use
-
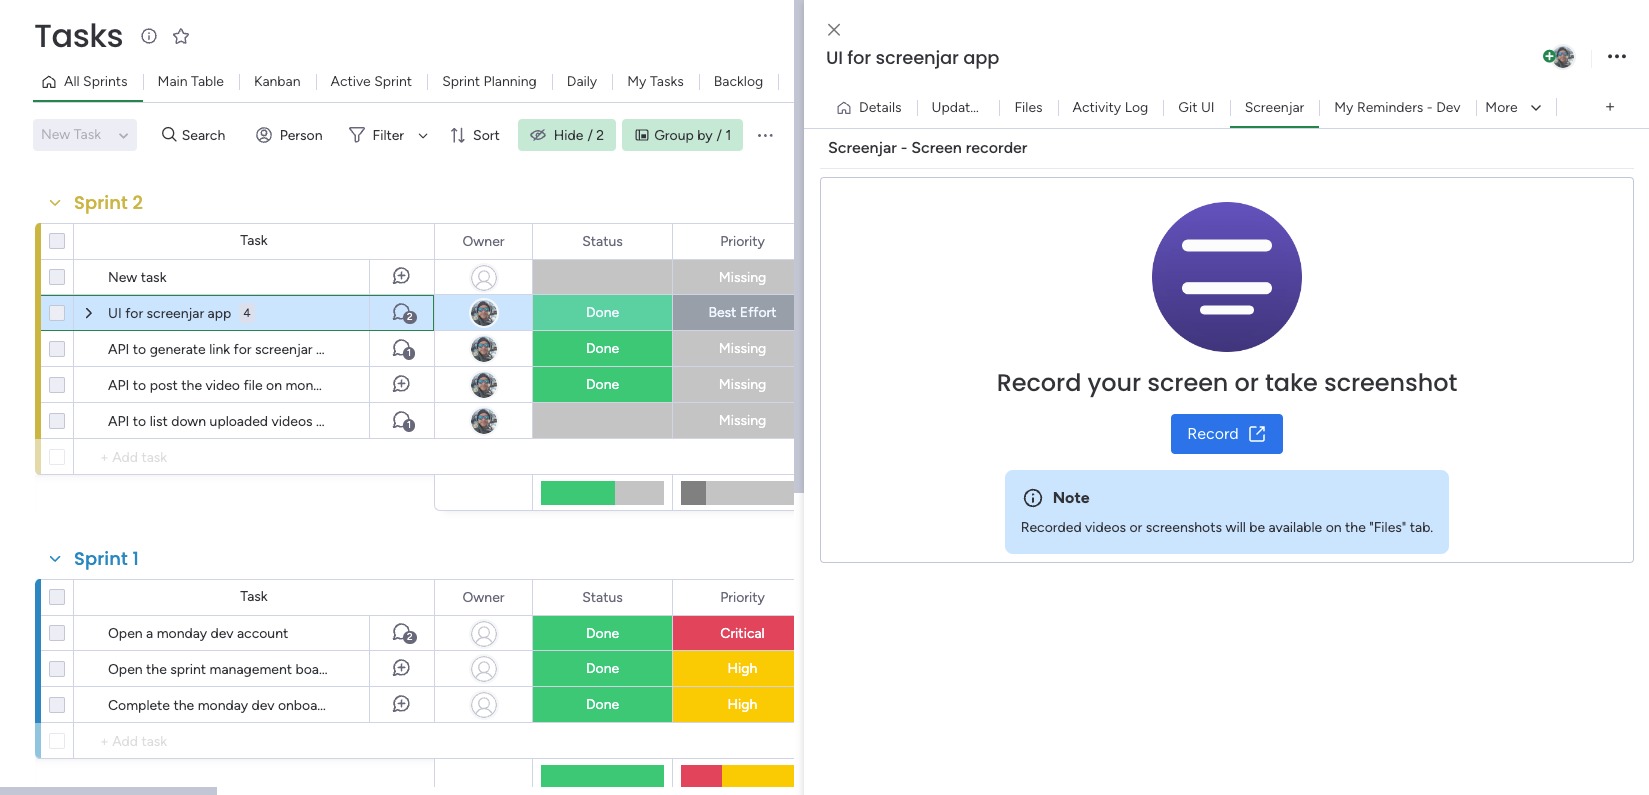
Once the app is installed on your monday.com instance, open any monday.com item & find the "Screenjar" tab
-
Under the "Screenjar" tab, you will find a button that says "Record". Clicking this button will open a new
browser tab.
-
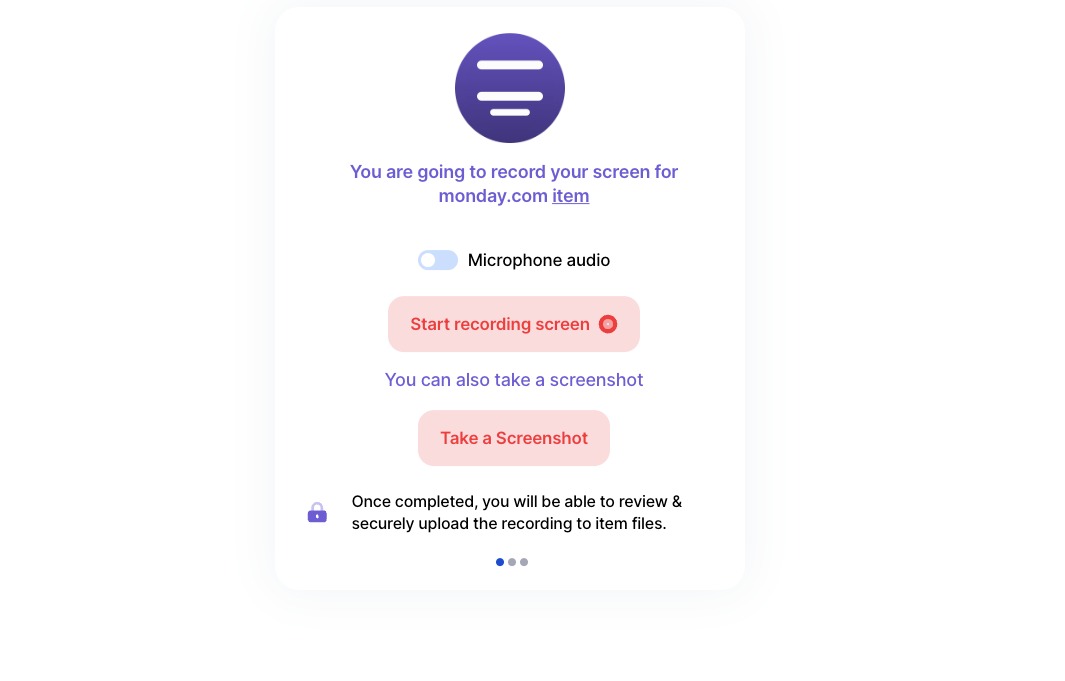
The new browser tab will have brief instructions around the process & two buttons. One for starting the
screen recording and the other one for taking an annotated screenshot. You can optionally record audio along
with the screen recording.
-
Note that, this unique url opened in the new tab is associated with the originating monday.com item and
any screen recording created or screenshot taken using it will be attached to the corresponding monday.com
item, if all the steps are followed through.
-
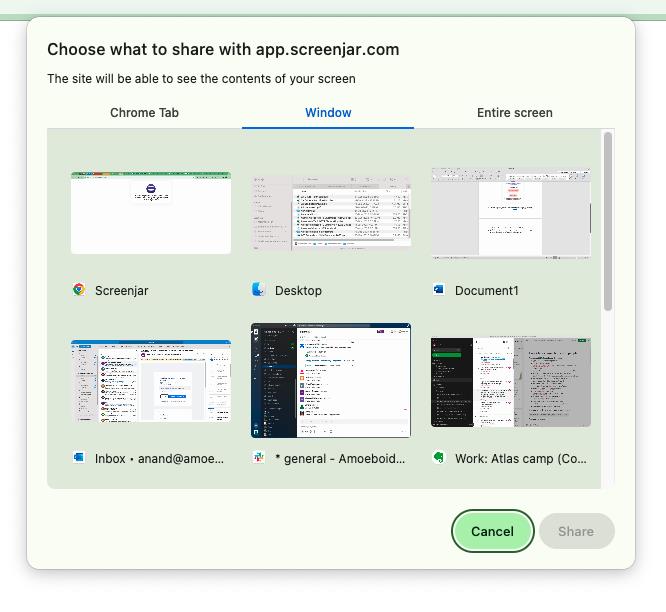
After clicking on "Start recording screen", the app will ask you to choose area of the screen that you
want to record. Here's how that will look like.
-
Choose an appropriate option to record a specific Chrome tab, a window or the entire screen. Once the
"Share" button is clicked, screen recording will start. This is how the screen will look like.
-
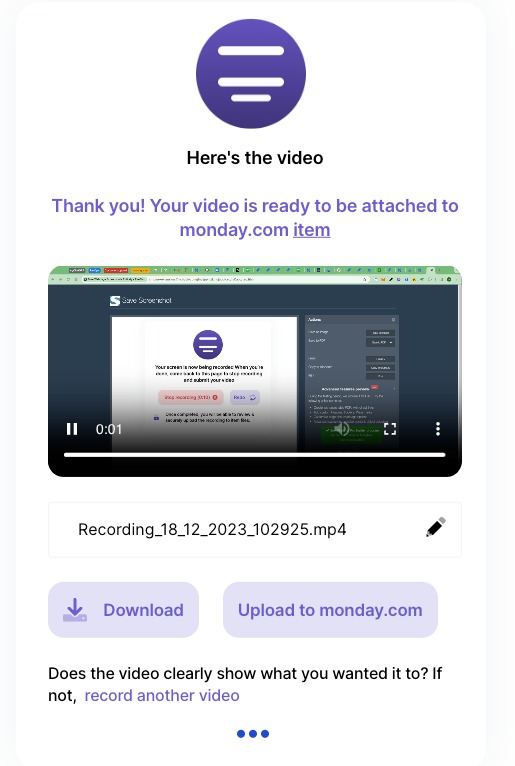
Take the necessary actions on your screen so that they get recorded & click on "Stop recording" once you
are done. "Redo" will restart the screen recording.
-
After you click on "Stop recording", you will be able to "review" the screen recording, rename it, redo
it, download it or if satisfied upload it directly to monday.com item.
-
Click on "Upload to monday.com" & the mp4 file will be attached directly to the originating item.
-
Follow the same steps to attach annotated screenshots to monday.com items.